Blog — MCAD Teaching Artist Practicum

Viewing entries by
Jack Powers

Making a Camera Obscura at Home!

Share

Making a Camera Obscura at Home!

Materials * Duct Tape * Electrical Tape * Scissors * A window * A separate piece of paper or board to put holes in (obscura lens) * A drill (not needed but c...

Camera Obscura 

Teaching Team Members:  Jack Powers  and Avery Nordin

Age or Grade Level: 11th and 12th Grade

VISUAL ARTS CONTENT / STANDARDS

Media Arts 2.9.2.2.1

High School

  1. Create

2. Generate and develop original artistic ideas.    

1. Apply aesthetic criteria in developing, proposing, and refining artistic ideas, plans, prototypes, and production processes for media artworks, considering original inspirations, audience and constraints.

OVERVIEW OF PROJECT

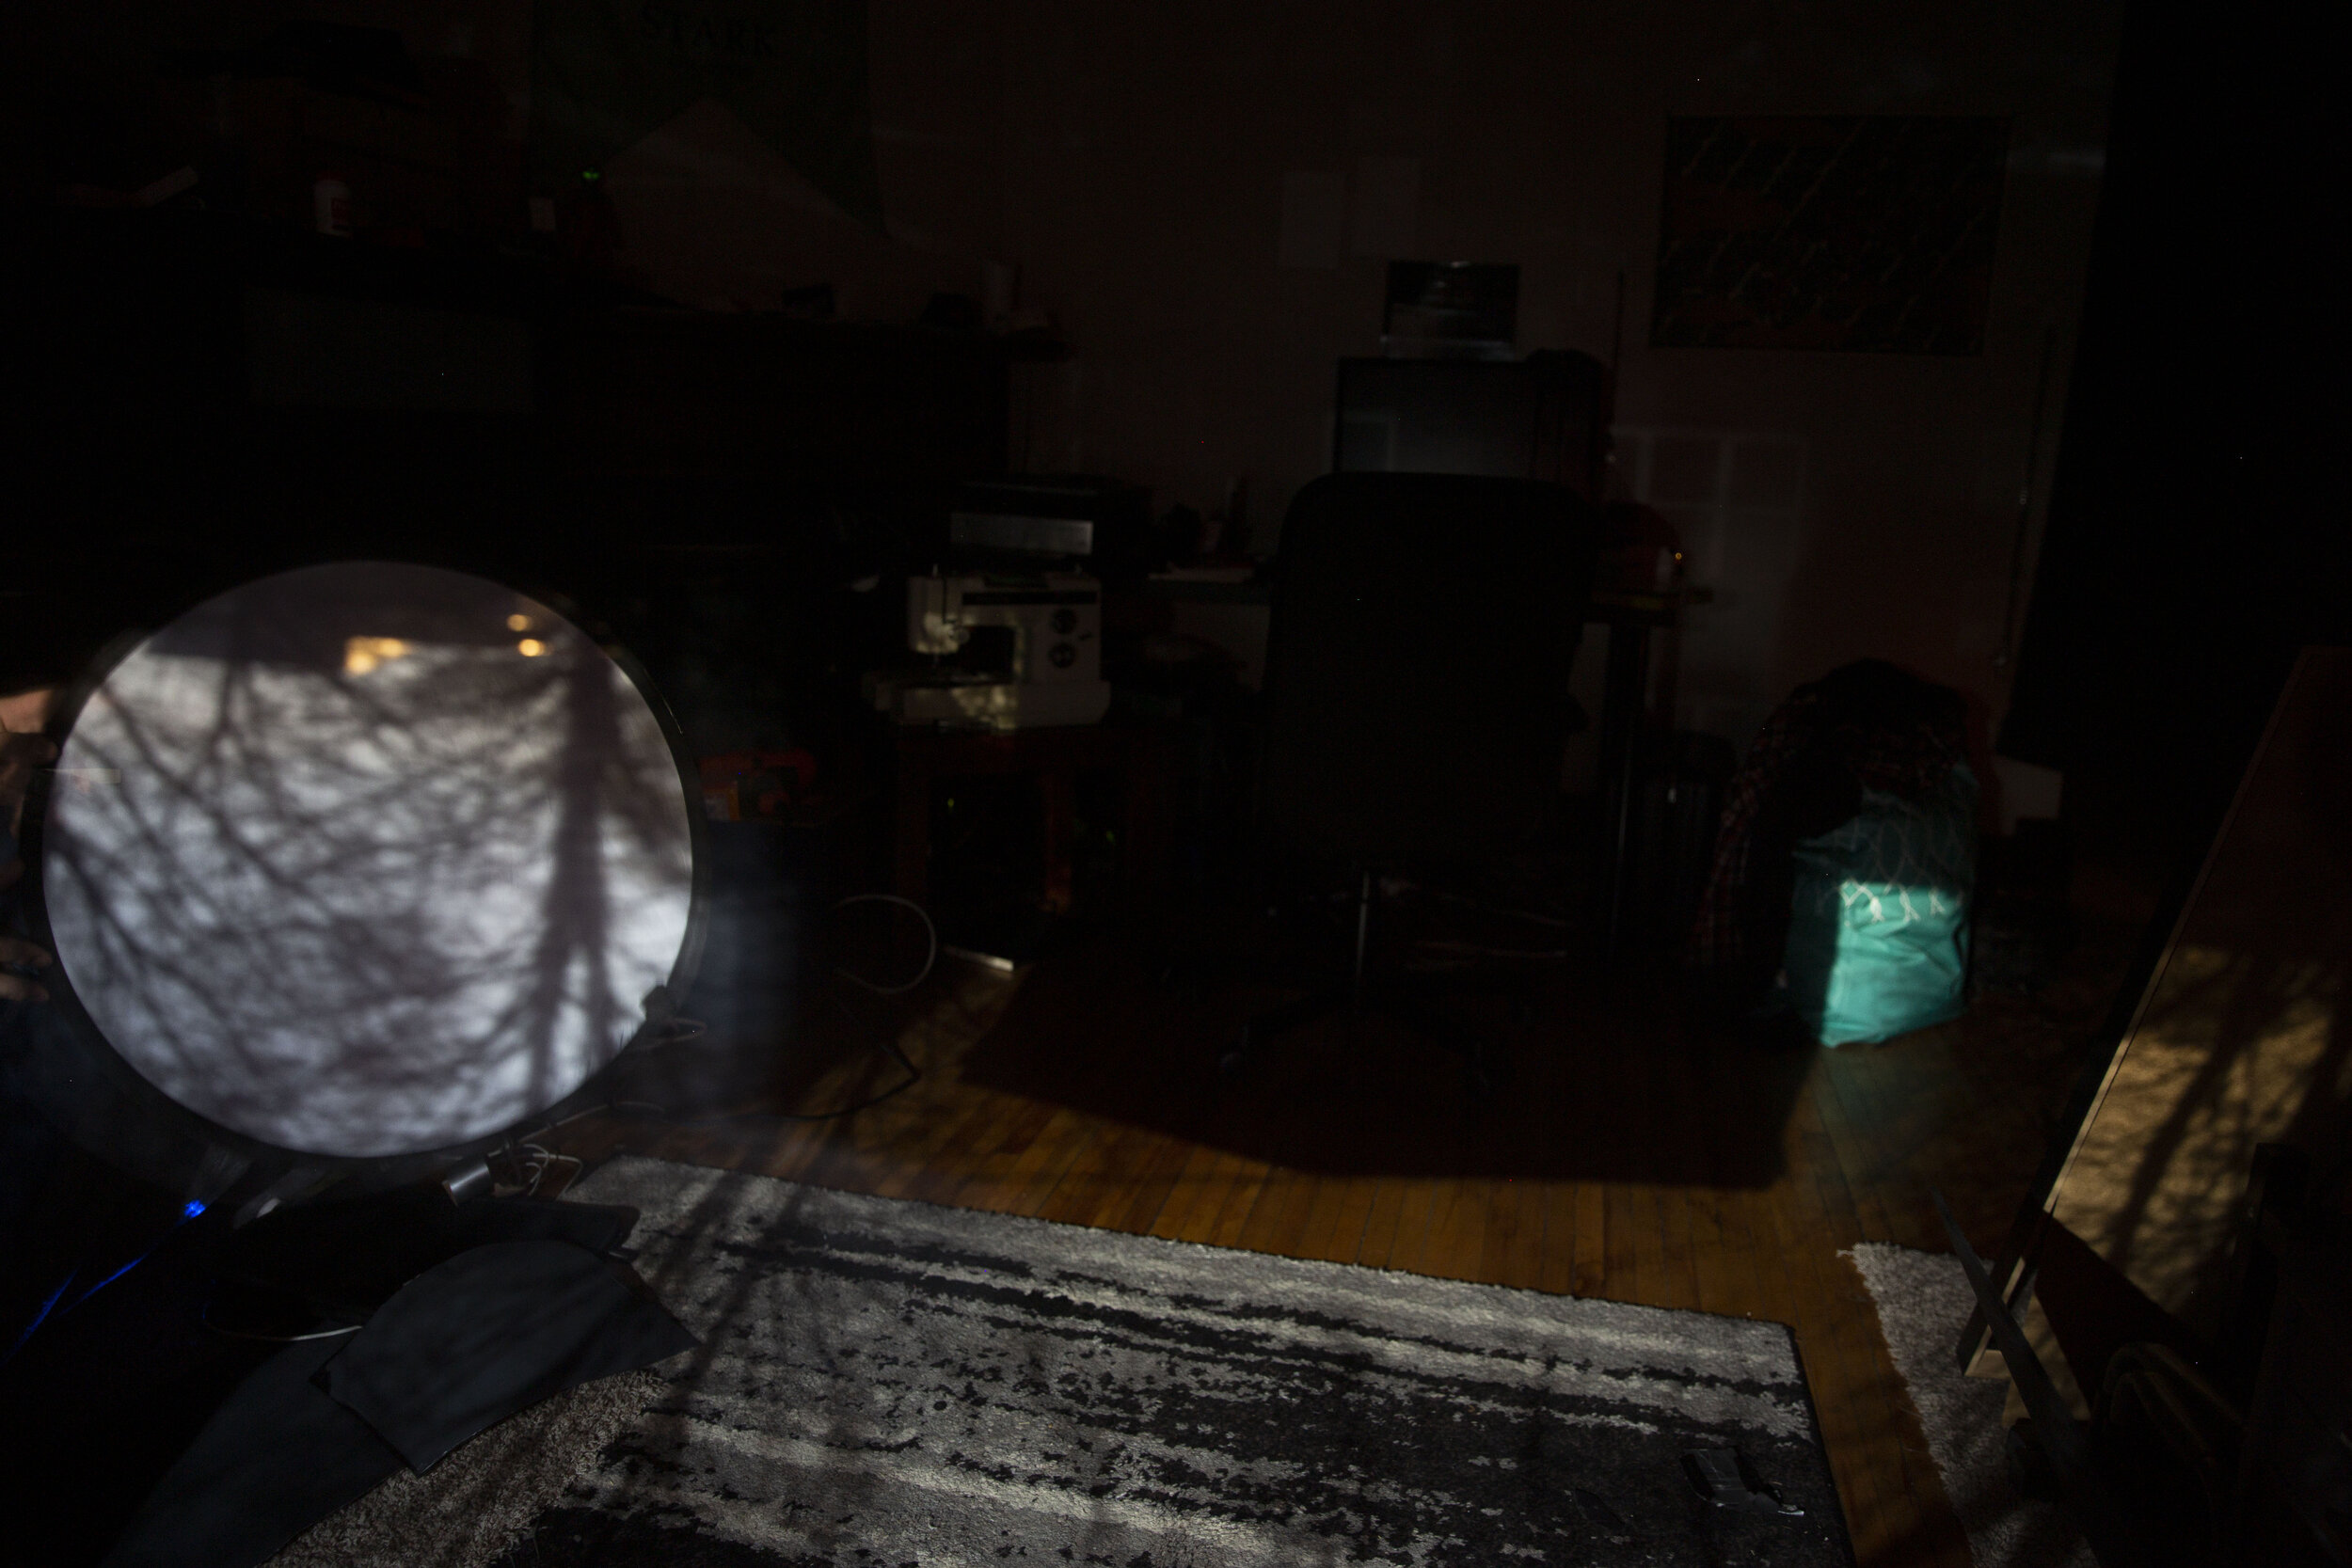
Students will be learning how a camera obscura works and then be turning one of their rooms into a camera.

“BIG IDEAS”/ ESSENTIAL QUESTION(S)

How can we work around lack of resources as a photographer? 

How does a camera work?

Why does an image get cast on a wall in the camera obscura?

Why is the image inverted? 

STUDENT OUTCOME OBJECTIVES

Students will:

1. Make their own camera obscura

2. Learn how cameras work.

3. Judge the accessibility of the process


PRIOR KNOWLEDGE

None needed

EXAMPLES OF ARTWORK

https://www.flickr.com/photos/stealw0rker/6784969629

https://www.flickr.com/photos/number7cloud/26357316558


ADDITIONAL RESOURCES

https://petapixel.com/2014/05/12/diy-tutorial-convert-room-camera-obscura/

ASSESSMENT

Upload an image of your camera obscura.

Fill out some assessment questions.

  • How does time of day affect the image?

  • How did the room you projected into effect the image?

  • Is this something you could use in your art practice? If so how?

  • What were some challenges in trying to do this from home?

SUPPORT DEMO by JACK POWERS AND AVERY NORDIN


MATERIALS

·       Duct Tape

·       Electrical Tape

·       Scissors

·       A window

·       A separate piece of paper or board to put holes in (obscura lens)

·       A drill (not needed but can be used to create clean holes)

·       White sheet or something to project image onto

-A few of the following to be used to black out the window:

·       Black Construction paper

·       Cardboard or black Garbage Bags

·       Anything that will help block out light completely


LEARNING ACTIVITIES AND TIMING

1.     Collect all the materials that you need prior to starting

2.     Find a room with a window you would like to black out.  Think about the time of day when you do this. How might it affect the image?

3.     Start to black out the window, but leave a spot in the middle for the obscura lens. The lens will just be another piece of paper or foam board that you’ll cut holes into for the light to come into the room.

4.     Once window is blacked out makes sure there are no light leaks. The darker the room the easier it will be to see the image.

5.     Cut the obscura lens. Decide how large you want the obscura hole. The smaller the hole the sharper the image, but the harder it will be to see. The larger the hole the brighter the image will be, but will have less detail. A 10 – 15 mm ( .5-.75”) hole in diameter is recommended to start, but experiment to see what other results you can get. If you even want to you could try to cut a whole for a camera lens to fit into. You can also have multiple holes and just cover the ones you don't want to use.

6.     Once everything is blacked out and the holes have been cut, you can now tape the Obscura lens to the window (shown in video). 

7.     Turn off the lights and see the image being projected into your room. Wait 10-15 mins for your eyes to adjust to the darkness before trying to adjust the obscura hole.

8.     If you can’t see an image, try setting up a projection screen (white boards or curtains in my case.) in front of the obscura lens hole.

9.     If you still cannot see an image, try making a larger hole or seeing if your room still has some light leaking in.

10.  Once you have an image being projected in, take a photo of it! You might need to do a long exposure. 

TEACHER REFLECTION

What problems do you anticipated with this lesson?

Is it accessible to all at home?

Will the materials be available at home?

Will students be interested?

Tape may not stick to various surfaces.

Too much light leak

Too little light outside - need a bright day

How does this project fit into overall curriculum planning for the subject areas and the arts?

            Shows how a camera works in a Photography class

How will your students’ work be shared with the community?

            If the students can document the work they can share in online folders in classes or on social media

How will you receive feedback on your teaching methodology and quality of student work?

            Assessment and evaluation form

Share

Caffenol at Home Black and White Film Developer

Share

Caffenol at Home Black and White Film Developer

Caffenol at Home Developer

Teaching Team Members:  Jack Powers

Age or Grade Level: 11th or 12th Grade

VISUAL ARTS CONTENT / STANDARDS

Media Arts 2.9.2.2.1

High School

1.Create

2.Generate and develop original artistic ideas.    

1. Apply aesthetic criteria in developing, proposing, and refining artistic

ideas, plans, prototypes, and production processes for media artworks,

considering original inspirations, audience and constraints.

OVERVIEW OF PROJECT

Students will be able to make this own developer at home. Most of the materials are available at your local grocery store (if you go out remember to practice social distancing!)  

“BIG IDEAS”/ ESSENTIALQUESTION(S)

How does accident play into art making?

How do materials, technique and accessibility effect the artists ability to work

STUDENT OUTCOME OBJECTIVES

Students will:

1. Make their own developer

2. Develop a roll of film

3. Judge the accessibility of the process 

PRIOR KNOWLEDGE

Basics of film development

EXAMPLES OF ARTWORK

https://www.flickr.com/groups/33051635@N00/pool/


ADDITIONAL RESOURCES

https://www.fieldmag.com/articles/how-to-develop-film-with-coffee-caffenol-guide

https://www.caffenol.org


ASSESSMENT

Upload an image of the developed roll.

Fill out some assessment questions.

 Did the demo represent the process?

Was this accessible to do at home?

How did the process change the outcome?

What were some challenges trying to do this from home?


MATERIALS

1 roll of undeveloped film

Vitamin C power or tablets (pulverized)

Instant coffee

Washing Soda  -  find it in laundry detergent aisle at the grocery store or in big-box stores, in hardware or home improvement stores or online

( addendum: WARNING: make sure to keep washing soda out of the reach of children and pets. You should wear gloves when cleaning with washing soda because it can cause skin irritation. It can be harmful to the eyes, cause irritation to the lungs if inhaled, and may cause abdominal pain or vomiting if large doses are swallowed.”

Washing soda can be made out of baking soda in the oven – have ventilation or open windows and take care in heating it up. https://sciencenotes.org/turn-baking-soda-washing-soda/

Fixer  https://www.ilfordphoto.com/rapid-fixer-product

Liquid dish soap

Glass or pyrex 16 ounce cup

Tsp (teaspoons – not Tbls tablespoon)

Vinyl, plastic or rubber gloves

Film processing tank or any light tight container or photo trays

Clothes pins and a hanger

Paper clips

Mixing containers


LEARNING ACTIVITIES AND TIMING

1.     Make the Washing Soda if needed and cool if it cannot be purchased.

2.     Collect all materials needed for the process from above list in one place where you will work by running water.

3.     Put on protective vinyl or rubber gloves.

4.     In one container mix 12 oz of tap water (room temp), ¾ tsps vitamin C powder (1000mg), 5 tsps instant coffee crystals (cannot be decaf), 3.5 tsps washing soda.

5.     Stir until all powder and crystals dissolve.

6.     Pour into sealed developing tank and agitate slowly for one minute, then agitate 2 time per minute for the following 11 minutes. Pour out Caffenol mix.

7.     Place tank under running water for 1 minute to stop developing process. Have the water as close to room temp as possible. It should not feel hot or cold to your touch.

8.     In another container, mix 2 oz of fixer with 6 oz of water. Pour this mix into tank and agitate slowly 2 times per minute for seven minutes. Save fix and bring to local darkroom (west photo) for disposal.

9.     In another container, mix water with a few drops of dish soap. Add to tank for a minute and agitate for the first 30 seconds. Let it rest for the last 30 seconds. Pour out and open tank.

10.  Pull out your film and hang to dry. You're all done.

11.  Scan film with scanner if possible if not, use your cell phone and take a picture of the negatives against a white screen on your laptop. Also you can scan the film with a DSLR if you have acess to one.  https://www.youtube.com/watch?v=xO-md8tiA6U

12.  Share images with Lauren. 

13.  Take the assessment to reflect on process and provide you and Laruen with Feedback.


TEACHER REFLECTION

What problems do you anticipated with this lesson?

Not everyone might be able to do the project.

Not everyone will have all the materials

Not everyone will want to do the project.

Not everyone will be able to see the results without a scanner or digital camera.

How does this project fit into overall curriculum planning for the subject areas and the arts?

            Is an alternative option to develop a roll yourself, rather than pay to have it done.

How will your students’ work be shared with the community?

            If they can scan the film they can share it however they’d like.

How will you receive feedback on your teaching methodology and quality of student work?

            Have the students will out an evaluation of the instructions and demo.


Share